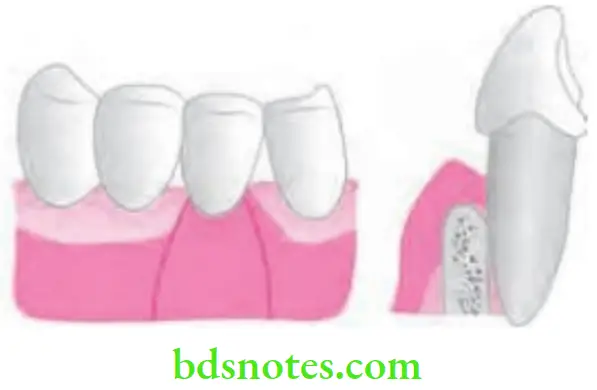
Denuded Root Coverage
Root Coverage Procedures for Denuded Roots
- Free epithelial autograft
- Free connective tissue autograft
- Pedicle autografts
- Rotational, i.e. Lateral pedicle flap and double papilla flap
- Advanced, i.e. Coronally displaced flap and semilunar flap
- Subepithelial connective tissue graft
- Subpedicle connective tissue
- Pouch and tunnel technique
- Envelope technique
- Guided-tissue regeneration technique.
“Understanding the role of root coverage in treating gingival recession”
The following is the Step-by-step Procedure for Laterally Displaced Flap:
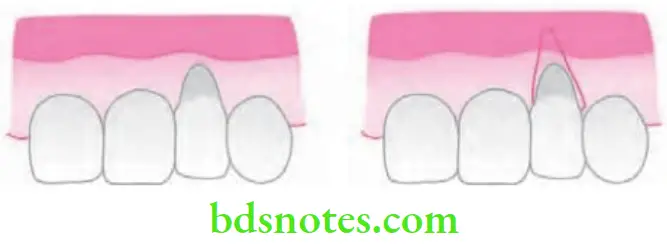
- Step 1: Preparation of the recipient site:
- Make an incision, resecting gingival margin around the exposed roots. This band of marginal gingiva is removed with a sealer or curette. The exposed root surface is planed well. If granulation tissue is present along the incised edge of the gingiva, it should be removed carefully with curettes.
“Importance of studying root coverage for dental professionals”
- Step 2: With a # l5 blade a vertical incision is made extending from marginal gingiva into the mucogingival junction. A crevicular incision is then made from the vertical incision to the defect.
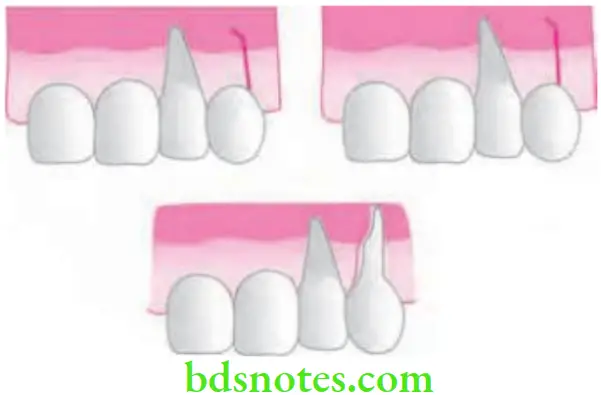
- A flap is then raised utilizing either partial thickness or full thickness reflection. However, if the gingiva is thin flap survival becomes difficult. It may sometimes be necessary to give a short oblique incision into the alveolar mucosa at the distal corner of the flap pointing more towards the recipient site. This will enable us to slide the flap laterally without excess tension at the base.
“Common challenges in managing denuded roots with surgery”
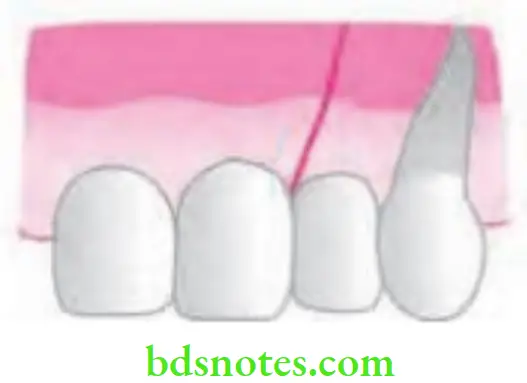
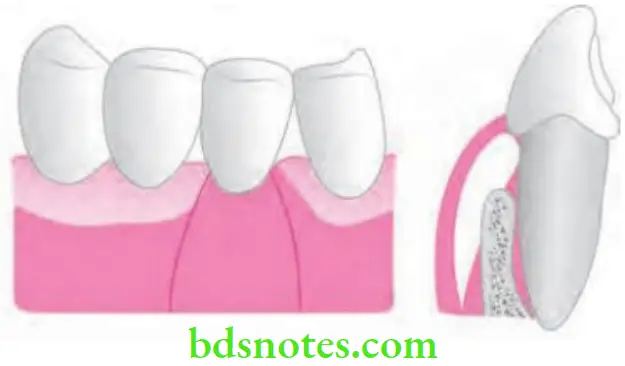
- Step 3: Transfer the flap.
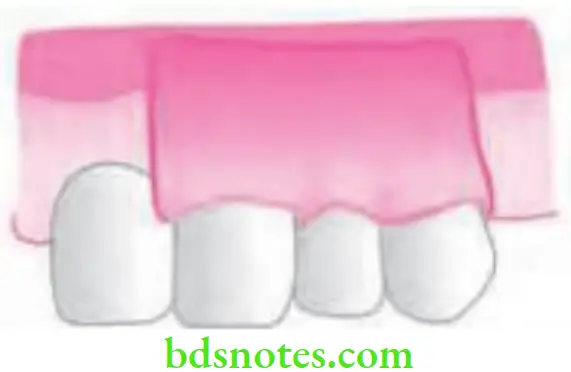
- After the flap is transferred on to the adjacent root, the flap is sutured to the adjacent gingiva and alveolar mucosa with interrupted sutures.
“Signs of effective root coverage after surgery”
- Step 4 : Protect the flap and donor site.
- Cover the surgical site with a periodontal pack and after one week the pack and sutures can be removed. Postoperatively, antibiotics are not always necessary in the normal course of treatment, but analgesics are prescribed. The flap may heal by connective tissue adhesion, or connective tissue attachment or long junctional epithelium.
“Role of connective tissue grafts in root coverage procedures”
The Following is the Step-by-step Procedure for Coronally Positioned Flap:
- Step 1: Make two apically-divergent vertical releasing incisions, extending from a point coronal to the cementoenamel junction at the mesial and distal line angles of the tooth and apically into the lining mucosa.
“Biomechanics of tissue integration explained”
- Step 2: A split thickness flap is prepared by sharp dissection at the mesial and distal ends and is connected with an intracrevicular incision. Facially, apical to the recession, a full thickness flap is raised.
- Step 3: Once the flap is reflected the root surfaces are debrided thoroughly. Some authors have suggested the use of citric acid with a pH l.0 for conditioning the root surface.
- Step 4: At the base of the inner surface of the flap, approximately 3 mm apical to the bone dehiscence, a horizontal incision is made through the periosteum, followed by a blunt dissection into the lining mucosa to release muscle tension. Now the mucosal graft can be easily positioned coronally at the level of cementoenamel junction.
“Treatment options for severe gingival recession requiring surgery”
- Step 5: The flap is secured firmly with the help of interrupted sutures and additional sling sutures can be placed to maintain the flap in place. Periodontal dressing is placed to protect the wound during initial healing.
Leave a Reply