Paralleling Technique In Dental Radiography
Write a short note on the Paralleling Technique for taking 26.
Answer. Following is the paralleling technique for taking 26
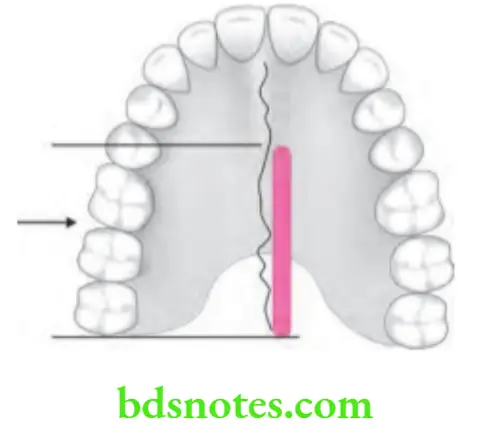
- Film placement: Film is positioned to cover the 26th.
- Film position: The film packet is placed in the midline of the palate, again to accommodate its height in the vault of the palate.
- The holder is rotated so that 26 touches the block. A cotton wool roll is placed on the reverse side of the bite block to help keep the tooth and the film packet parallel, and the film holder more comfortable for the patient. The patient is requested to gently bite together to stabilize the holder in position.
“Understanding the role of the paralleling technique in accurate dental imaging: Q&A explained”
- The lower locator ring is moved down the indicator rod until it is in contact with the patient’s face. The correct focal spot to film distance is determined as long cone is aligned with the locator ring. This automatically sets the vertical and horizontal angles and centers the X-ray beam on the film packet.
paralleling technique in dental radiography
“Importance of studying the paralleling technique for better imaging outcomes: Questions explained”
“Common challenges in applying the paralleling technique effectively: FAQs provided”
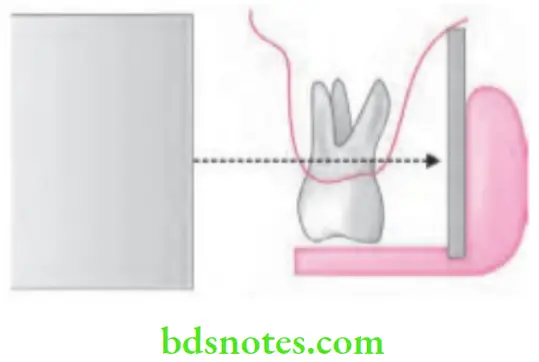
- Vertical angulation: Central ray of the X-ray beam must be directed perpendicular to the film and the long axis of 26.
- Horizontal angulation: Central ray of X-ray beam must be directed through the contact areas between the teeth.
paralleling technique dental x-ray
“Steps to explain different radiographic techniques: Paralleling vs bisecting angle: Q&A guide”
- Projection of central ray: It is directed on the cheek below the outer canthus of eye and the zygoma at the position of 27, perpendicular to the plane of film.
- The exposure is made.
Leave a Reply